Integrate Kafka with HDFS using Camus (Twitter Stream Example)
A step-by-step guide to building a Kafka-to-HDFS data pipeline using Camus and a Twitter stream. This guide is aimed at developers looking for a practical, detailed walkthrough. —
Table of Contents
- Integrate Kafka with HDFS using Camus (Twitter Stream Example)
Introduction
When building data pipelines, it’s common to need to move data from Kafka to HDFS for further processing or analytics. Camus is LinkedIn’s open-source tool for this purpose. This guide will walk you through setting up a pipeline that ingests a Twitter stream into Kafka and then uses Camus to write that data to HDFS.
What is Camus?
Camus is a MapReduce job that pulls data from Kafka and writes it to HDFS, supporting features like:
- Automatic topic discovery
- Avro schema management (in progress)
- Date-based partitioning
For more details, see the Camus README.
Requirements
- Apache Hadoop 2+
- Apache Kafka 0.8
- Twitter Developer Account (for API keys)
- Apache Zookeeper (required for Kafka)
- Oracle JDK 1.7 (64-bit)
Build Environment
- Eclipse (or your preferred IDE)
- Apache Maven 2/3
Building Camus
-
Clone the Camus repository:
git clone https://github.com/linkedin/camus.git cd camus -
Update Hadoop version:
Edit
camus/pom.xmlto match your Hadoop version. For Hadoop 2.6.0, update the dependency:<dependency> <groupId>org.apache.hadoop</groupId> <artifactId>hadoop-client</artifactId> <version>2.6.0</version> </dependency> -
Build the project:
mvn clean package -DskipTestsWait for the
BUILD SUCCESSmessage. The first build may take some time.
Camus Essentials: Decoder and RecordWriterProvider
Camus uses two main components:
-
MessageDecoder: Decodes messages read from Kafka. Camus provides several decoders (e.g.,
JsonStringMessageDecoder,StringMessageDecoder). You can also implement your own by extendingcom.linkedin.camus.coders.MessageDecoder. -
RecordWriterProvider: Writes messages to HDFS. Implementations extend
com.linkedin.camus.etl.RecordWriterProvider. Camus provides several, such asStringRecordWriterProvider.
Configuring and Running Camus
Start Hadoop and JobHistory Server
Make sure Hadoop and the JobHistory server are running. From your Hadoop installation’s sbin directory:
start-dfs.sh
start-yarn.sh
mr-jobhistory-daemon.sh start historyserver
Kafka and Twitter Setup
- Set up Kafka and configure a producer to ingest Twitter data. See this guide for details.
- Use topic:
twitter-topic - Set client id:
camus - Keep the producer running to generate data.
Camus Properties Configuration
Camus uses a properties file (commonly camus.properties) for configuration. Key settings include:
-
Decoder and Writer:
camus.message.decoder.class.twitter-topic=com.linkedin.camus.etl.kafka.coders.JsonStringMessageDecoder etl.record.writer.provider.class=com.linkedin.camus.etl.kafka.common.StringRecordWriterProvider -
Kafka and HDFS paths:
kafka.client.name=camus kafka.brokers=localhost:9092 etl.destination.path=/user/hduser/topics etl.execution.base.path=/user/hduser/exec etl.execution.history.path=/user/hduser/camus/exec/history -
Timestamp extraction:
  camus.message.timestamp.field=created_at
  camus.message.timestamp.format=ISO-8601
Sample camus.properties
Below is a sample camus.properties file with common settings:
# Job name
camus.job.name=Camus Job

# Output directories
etl.destination.path=/user/hduser/topics
etl.execution.base.path=/user/hduser/exec
etl.execution.history.path=/user/hduser/camus/exec/history

# Decoder for twitter-topic
camus.message.decoder.class.twitter-topic=com.linkedin.camus.etl.kafka.coders.JsonStringMessageDecoder

# Timestamp extraction
camus.message.timestamp.field=created_at
camus.message.timestamp.format=ISO-8601

# Kafka settings
kafka.client.name=camus
kafka.brokers=localhost:9092

# Record writer
etl.record.writer.provider.class=com.linkedin.camus.etl.kafka.common.StringRecordWriterProvider

# MapReduce settings
mapred.map.tasks=5
kafka.max.pull.hrs=1
kafka.max.historical.days=3
kafka.max.pull.minutes.per.task=-1

# Compression (set to true in production)
mapred.output.compress=false
etl.output.codec=deflate
etl.deflate.level=6

# Timezone
etl.default.timezone=America/Los_Angeles
etl.output.file.time.partition.mins=60

# Error handling
etl.ignore.schema.errors=false
max.decoder.exceptions.to.print=5

# Other settings can be left as default or tuned as needed
Running Camus
After building Camus, you should find a jar file in the target folder of the camus-example module, e.g.:
camus-example-0.1.0-SNAPSHOT-shaded.jar
To run Camus, place the jar and your camus.properties file in the same directory and execute:
hadoop jar camus-example-0.1.0-SNAPSHOT-shaded.jar com.linkedin.camus.etl.kafka.CamusJob -P camus.properties
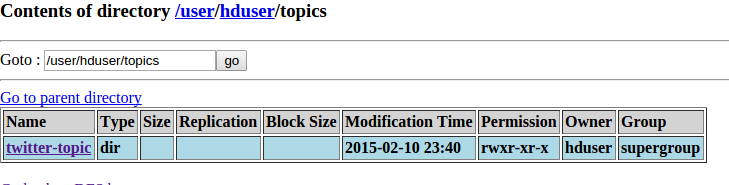
If successful, you should see records in HDFS at the path specified in etl.destination.path (e.g., /user/hduser/topics/).
Troubleshooting & Tips
- Compression: For production, set
mapred.output.compress=truefor better storage efficiency. - Custom Decoders/Writers: If your data format is custom, implement your own
MessageDecoderorRecordWriterProvider. - Partitioning: Camus supports hourly/daily partitioning. Adjust
etl.partitioner.classas needed. - Schema Registry: For Avro data, configure the schema registry class.
- Error Handling: Set
etl.ignore.schema.errors=trueto skip problematic records instead of failing the job.
Conclusion
Camus makes it straightforward to build robust Kafka-to-HDFS pipelines. With the right configuration, you can reliably ingest streaming data (like Twitter feeds) into HDFS for further processing. If you encounter issues, check logs and configuration paths, and feel free to reach out in the comments.
Happy Learning!