What is Swagger?
“Any fool can write code that a computer can understand. Good programmers write code that humans can understand.”
— Martin Fowler
Swagger is based on the OPEN API specification and is a complete framework for describing, producing, consuming, and visualizing RESTful web services by effectively mapping all the resources and operations associated with it.
The goal of Swagger is to enable client and documentation systems to update at the same pace as the server. The documentation of methods, parameters, and models are tightly integrated into the server code, allowing APIs to always stay in sync.
![]()
Why is Swagger useful?
The framework simultaneously solves the server, client, and documentation/sandbox needs.
With Swagger’s declarative resource specification, clients can understand and consume services without knowledge of server implementation or access to the server code. The Swagger UI allows both developers and non-developers to interact with the API in a sandbox UI that gives a clear insight into how the API responds to parameters and options.
It supports both JSON and XML, with additional formats in progress.
Now let’s see a working example and how to configure Swagger to generate API documentation for our sample REST API created using Spring Boot.
How to Enable Swagger in your Spring Boot Web Application?
If you’re one of those lazy people who hate reading configuration, download the complete working example here, otherwise, read on:
Step 1: Include Swagger-SpringMVC dependency in Maven
<dependency>
    <groupId>com.mangofactory</groupId>
    <artifactId>swagger-springmvc</artifactId>
    <version>0.8.8</version>
</dependency>
Step 2: Create a Swagger Java Configuration
- Use the
@EnableSwaggerannotation. - Autowire
SpringSwaggerConfig. - Define one or more
SwaggerSpringMvcPlugininstances using Spring’s@Beanannotation.
👉 Gist: SwaggerConfig.java
Step 3: Create Swagger UI using WebJar
To use the WebJar dependency, add the following repository and dependency, which will auto-configure the Swagger UI for you:
<repository>
  <id>oss-jfrog-artifactory</id>
  <name>oss-jfrog-artifactory-releases</name>
  <url>http://oss.jfrog.org/artifactory/oss-release-local</url>
</repository>
<dependency>
  <groupId>org.ajar</groupId>
  <artifactId>swagger-spring-mvc-ui</artifactId>
  <version>0.1</version>
  <scope>compile</scope>
</dependency>
That’s it. Now run the Application.java as a Java application in your IDE. The application should start in an embedded Tomcat/Jetty server on default port 8080.
Verify the API Configuration
Visit:
http://localhost:8080/api-docs
Expected output:
{
  "apiVersion": "1.0",
  "swaggerVersion": "1.2",
  "apis": [
    {
      "path": "/default/hello-controller",
      "description": "Hello Controller"
    }
  ],
  "info": {
    "title": "SaurzCode API",
    "description": "API for Saurzcode",
    "termsOfServiceUrl": "Saurzcode API terms of service",
    "contact": "[email protected]",
    "license": "Saurzcode API Licence Type",
    "licenseUrl": "Saurzcode API License URL"
  }
}
And finally, view and test the APIs at:
http://localhost:8080/index.html
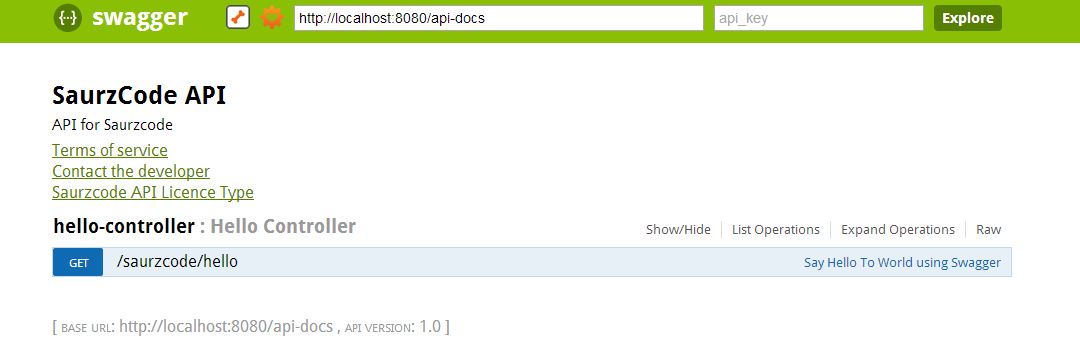
⚠️ Note:
The default URL in web jar files is:
http://petstore.swagger.wordnik.com/api/api-docs
So you might see an error:
“Can’t read from the server. It may not have the appropriate access-control-origin settings.”
Solution:
Replace the URL on screen from:
http://petstore.swagger.wordnik.com/api/api-docs
to
http://localhost:8080/api-docs
🔗 Complete Project
View the full example here:
https://github.com/saurzcode/saurzcode-swagger-spring